- 总目标:实现动漫人脸识别、建立动漫人脸数据库
- 本文定位在有一定python、linux基础和我这样的学生阅读
- 遇到问题❓/错误❌,请查看文末或文章间隙
1、标注图片中动漫人物的脸部
环境:
服务器:腾讯云(新用户优惠,阿里云之前使用了)
操作系统:CetenOS 6.5 (环境配置复杂度: Window > Centos > Ubuntu 因个人原因使用centos较多)
python版本:3.5(自带2.6.6)
window端(客户端)工具:Xshell、Xftp
1.1、依赖下载:
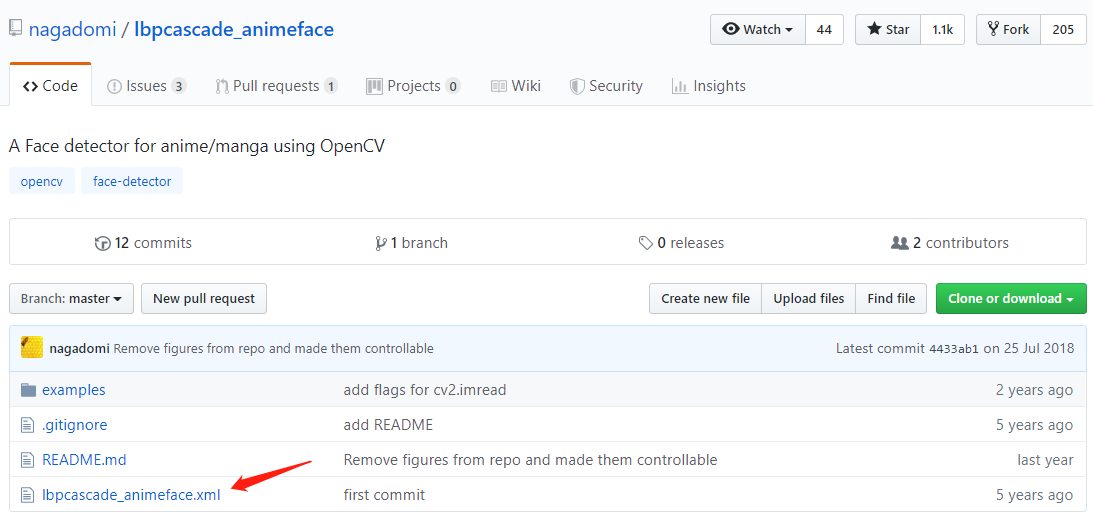
① 动漫人脸分类器下载:
https://github.com/nagadomi/lbpcascade_animeface/
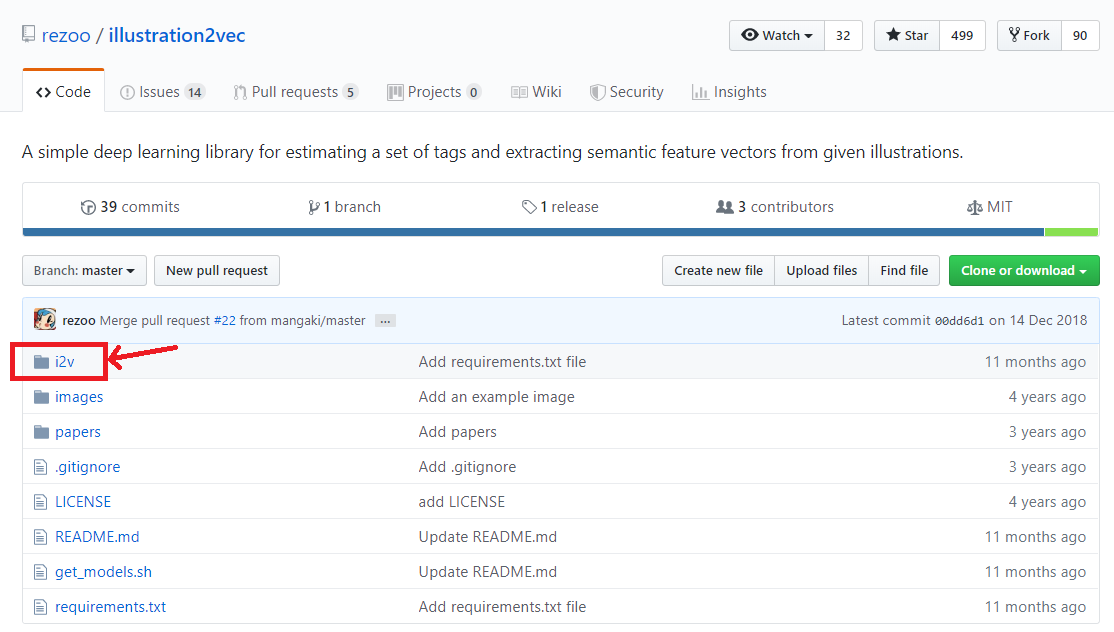
② i2v库的安装:
Github:https://github.com/rezoo/illustration2vec/
1.2、Test环境:
准备下linux服务器主机(centos)属性、环境:
-
python -V
-
安装anaconda(推荐安装中等较新版本,尽量避免未知错误)/ 安装pip(可能后续会出问题)
CentOS 7安装Anaconda3 -
import cv2
可能会遇到anaconda崩了,涉及python多重版本conda软链接指向出了问题等:
- 修改软链接
- 修改.bashrc
- 重新安装anaconda
- 或者使用了清华源或其他源的旧版本,或官方版的最新,尝试anaconda版本回退一点点
1.3、参数查询、环境调试结束,开始测试功能:
文件目录:
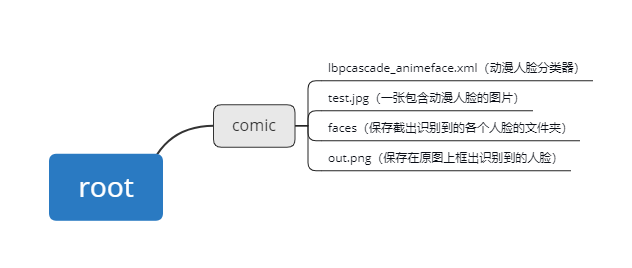
动漫人脸检测并截取:
(尝试进行从一张图片中识别并截取人脸进行保存的操作)
#coding=utf-8
import cv2
import sys
import os.path

cascade = cv2.CascadeClassifier('/root/comic/lbpcascade_animeface.xml')  # 引入xml
image = cv2.imread('/root/comic/test.jpg', cv2.IMREAD_COLOR)  # 读入一幅彩色图片
gray = cv2.cvtColor(image, cv2.COLOR_BGR2GRAY)  # 色彩空间转换
gray = cv2.equalizeHist(gray)  # 图像直方图均衡化

faces = cascade.detectMultiScale(gray,
                                 # detector options
                                 scaleFactor=1.1,
                                 minNeighbors=5,
                                 minSize=(24, 24))

i = 0
for (x, y, w, h) in faces:
    cv2.rectangle(image, (x, y), (x + w, y + h), (0, 0, 255), 2)

    face = image[y: y + h, x:x + w, :]
    face = cv2.resize(face, (96, 96))
    save_filename = '%s_%d.png' % (os.path.basename('/root/comic/faces/').split('.')[0], i)
    cv2.imwrite("/root/comic/faces/" + save_filename, face)
    i = i + 1

#cv2.imshow("AnimeFaceDetect", image)
cv2.waitKey(0)
cv2.imwrite("/root/comic/out.png", image)
2、截取并保存视频一帧帧截取到的动漫人脸(目标):
2.1、文件目录:
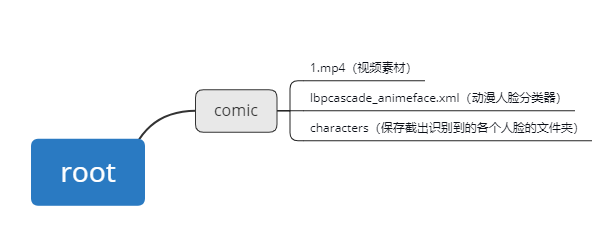
2.2、导入视频一帧帧截取动漫人脸:
#coding=utf-8
import cv2
import os

face_id = 1
count = 0
cap = cv2.VideoCapture('/root/comic/1.mp4')
face_detector = cv2.CascadeClassifier('/root/comic/lbpcascade_animeface.xml')

while True:

    # 从摄像头读取图片
    sucess, img = cap.read()
    # 转为灰度图片
    gray = cv2.cvtColor(img, cv2.COLOR_BGR2GRAY)
    # 检测人脸
    faces = face_detector.detectMultiScale(gray, 1.3, 5)
    for (x, y, w, h) in faces:
        cv2.rectangle(img, (x, y), (x+w, y+w), (255, 0, 0))
        count += 1
        font = cv2.FONT_HERSHEY_TRIPLEX
        cv2.putText(img, 'num:%d' % (count), (x + 30, y + 30), font, 1, (255, 0, 255), 4)
        # 保存图像
        cv2.imwrite("/root/comic/characters/User." + str(face_id) + '.' + str(count) + '.jpg', gray[y: y + h, x: x + w])
        #cv2.imshow('image', img)
    # 保持画面的持续。
    k = cv2.waitKey(1)

    if k == 27:   # 通过esc键退出摄像
        break

# 关闭摄像头
cap.release()
cv2.destroyAllWindows()
2.2、分类图片:
将不同人物分类到属于他命名的文件夹下:
#开发中
3、训练图片:
开始制定、训练出模型(代码太长影响观感,完整代码github):
#coding=utf-8
from skimage import io, transform
import glob
import os
import tensorflow as tf
import numpy as np
import time
import matplotlib.pyplot as plt

# 训练验证数据集目录
path = '/root/comic_reg/data/train-validation-set/'#最后少了个斜杠 读入失败
# 模型保存地址,最后接的是模型名字
model_path = '/root/comic_reg/model/model.ckpt'

# 将所有的图片resize成100*100

# 读取图片

# 打乱顺序

# 将所有数据分为训练集和验证集
ratio = 0.7
s = np.int(num_example*ratio)
x_train = data[:s]
y_train = label[:s]
x_val = data[s:]
y_val = label[s:]

# -----------------构建网络----------------------
# 占位符
x = tf.placeholder(tf.float32, shape=[None, w, h, c], name='x')
y_ = tf.placeholder(tf.int32, shape=[None, ], name='y_')

# 第一个卷积层(100——>50)

# 第二个卷积层(50->25)

# 第三个卷积层(25->12)

# 第四个卷积层(12->6)

# 全连接层

# ---------------------------网络结束---------------------------

# (小处理)将logits乘以1赋值给logits_eval,定义name,方便在后续调用模型时通过tensor名字调用输出tensor

# 定义一个函数,按批次取数据

# 训练和测试数据,可将n_epoch设置更大一些
n_epoch = 50
batch_size = 32
saver = tf.train.Saver()
sess = tf.Session()
sess.run(tf.global_variables_initializer())

# 自定义保存数据列表
trainlosslist = []
trainacclist = []
validationlosslist = []
validationacclist = []


for epoch in range(n_epoch):
    start_time = time.time()

    # training
    train_loss, train_acc, n_batch = 0, 0, 0
    for x_train_a, y_train_a in minibatches(x_train, y_train, batch_size, shuffle=True):
        _, err, ac = sess.run([train_op,loss,acc], feed_dict={x: x_train_a, y_: y_train_a})
        train_loss += err; train_acc += ac; n_batch += 1
    print("   train loss: %f" % (train_loss / n_batch))
    print("   train acc: %f" % (train_acc / n_batch))
    # 添加到列表
    trainlosslist.append(train_loss / n_batch)
    trainacclist.append(train_acc / n_batch)

    # validation
    val_loss, val_acc, n_batch = 0, 0, 0
    for x_val_a, y_val_a in minibatches(x_val, y_val, batch_size, shuffle=False):
        err, ac = sess.run([loss, acc], feed_dict={x: x_val_a, y_: y_val_a})
        val_loss += err; val_acc += ac; n_batch += 1
    print("   validation loss: %f" % (val_loss / n_batch))
    print("   validation acc: %f" % (val_acc / n_batch))
    # 添加到列表
    validationlosslist.append(val_loss / n_batch)
    validationacclist.append(val_acc / n_batch)

saver.save(sess,model_path)
sess.close()

# 绘图
x = np.arange(1, n_epoch, 1)

plt.plot(x, np.array(trainacclist)[x-1], label="train-acc")
plt.plot(x, np.array(validationacclist)[x-1], label="validation-acc")
plt.plot(x, np.array(trainlosslist)[x-1], label="train-loss")
plt.plot(x, np.array(validationlosslist)[x-1], label="validation-loss")

# 设置坐标轴名称
plt.xlabel('epoch')

# 画两条基准线
plt.plot(x, x/x, label="one")
plt.plot(x, x-x, label="zero")

# 参数:loc设置显示的位置,0是自适应;ncol设置显示的列数
plt.legend(loc=0, ncol=1)
#plt.show()
plt.savefig("/root/comic_reg/out.png")
4、识别图片:
from skimage import io,transform
import tensorflow as tf
import numpy as np
import glob

path = '/root/comic_reg/data/test-set/*.png'

image_dict = {0: '一花',1:'二乃',2:'三玖',3:'四叶',4:'五月'}
count_true=[]

w=100
h=100
c=3

def read_one_image(path):
    img = io.imread(path)
    img = transform.resize(img,(w,h))
    return np.asarray(img)

with tf.Session() as sess:
    data = []

    # 目录列表
    paths = glob.glob(path)
    #print(paths)
    for img in paths:
        data.append(read_one_image(img))

    saver = tf.train.import_meta_graph('/root/comic_reg/model/model.ckpt.meta')
    saver.restore(sess,tf.train.latest_checkpoint('/root/comic_reg/model/'))

    graph = tf.get_default_graph()
    x = graph.get_tensor_by_name("x:0")
    feed_dict = {x:data}

    logits = graph.get_tensor_by_name("logits_eval:0")

    classification_result = sess.run(logits,feed_dict)


    #打印出预测矩阵
    print("\n预测矩阵:\n", classification_result)
    #打印出预测矩阵每一行最大值的索引
    print("\n简略结果:\n", tf.argmax(classification_result,1).eval(), '\n')
    print("具体情况: ")
    #根据索引通过字典对应人物的分类
    output = []
    output = tf.argmax(classification_result,1).eval()
    count = 0
    for i in range(len(output)):
        # output[i]是测试结果编码,paths[i])[-7]是原定图片编号(路飞1)
        flag = False
        if str(output[i]+1) == paths[i][-7]:
            flag = True
            if flag == True:
                count_true.append(paths[i][-7:])
            count += 1
        print("第 " + str(i+1) +  " 张 (" +   paths[i][-7:] + ") 人物预测: " + image_dict[output[i]]  + " " + str(flag))
    print("\n准确率: {:.2f}%".format(count / len(output) * 100 ))

print(count_true)
结果:
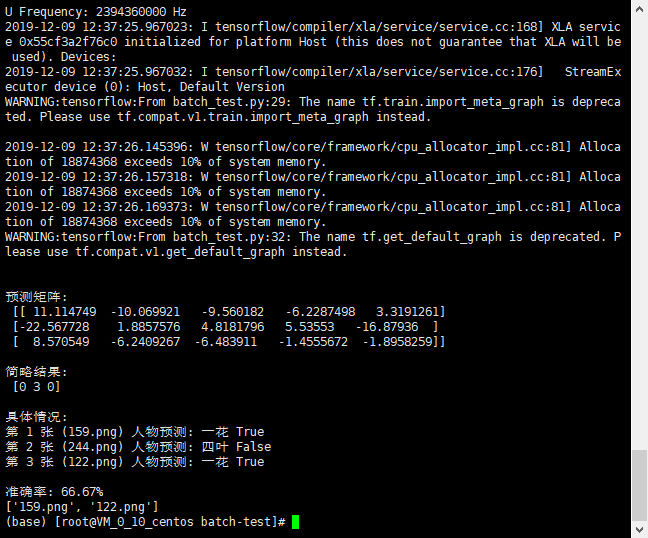
因为只有第一个人物图片准备充足所以其他人物识别率会偏低
之前使用:
服务器:腾讯云
操作系统:Ubuntu Server 18.04.1 LTS 64位
类型:公共镜像(池)
内存:2 GB
CPU:1 核
硬盘:50 G
公网带宽:1 Mbps
步骤1.1中可能遇到的问题:
1.下载速度太慢:
法一:
liunx 下载 Github_Releases 下载提速:
Linux系统下hosts文件的位置是 /etc/hosts ,以root用户登录Linux,使用vi编辑/etc/hosts文件,将附加的内容添加在其后面即可:
修改hosts(liunx):
52.216.186.155 github-production-release-asset-2e65be.s3.amazonaws.com

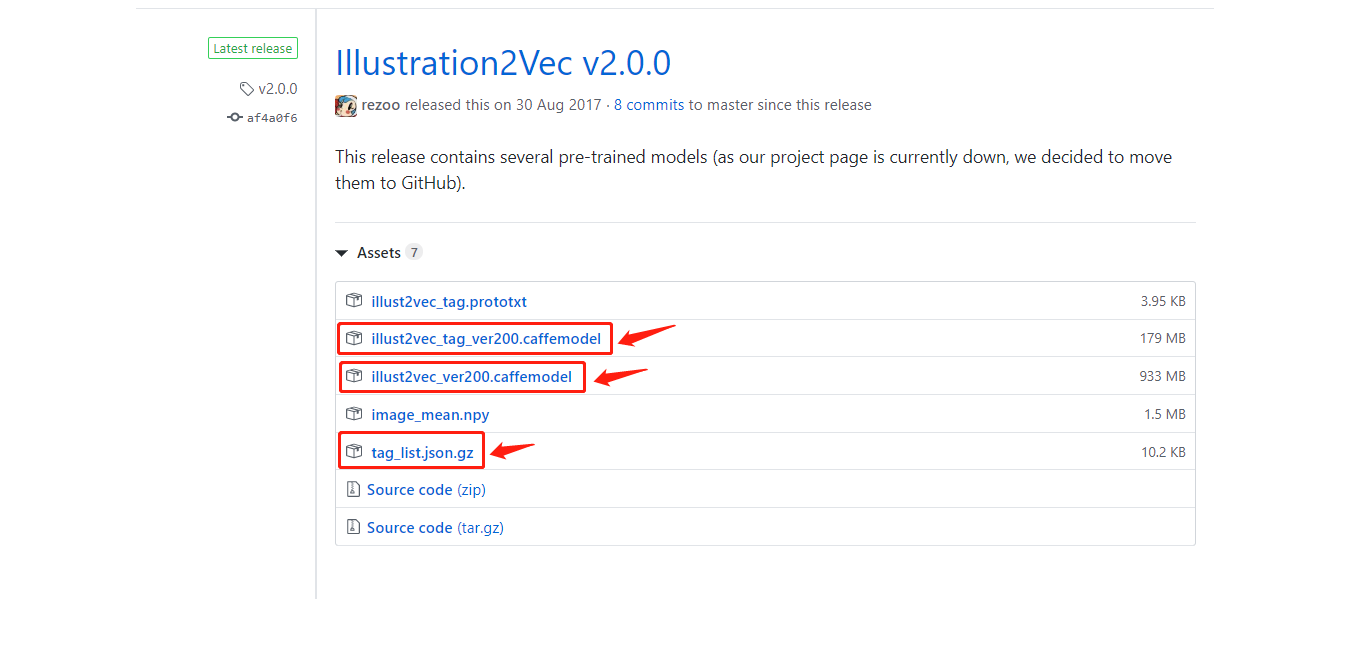
wget https://github.com/rezoo/illustration2vec/releases/download/v2.0.0/illust2vec_tag_ver200.caffemodel

以此类推...
法二:
修改hosts(window):
当我们需要本地调试网站或者屏蔽某个网站的时候可以手动将这个网站添加到系统hosts文件中,因为hosts文件的优先级高于DNS,所以可以达到你想要在浏览器里呈现的结果,当然这只在本地有用!
一、Windows中hosts文件一般在C:\Windows\System32\drivers\etc目录下,格式是
127.0.0.1 localhost
::1 localhost
52.216.186.155 github-production-release-asset-2e65be.s3.amazonaws.com
可以用记事本修改,前面是IP地址,后面是域名。127.0.0.1这个是本地环回地址。
比如127.0.0.1 www.baidu.com就是把www.baidu.com这个域名指向127.0.0.1的地址。
##法三:
Github镜像网站:http://github-mirror.bugkiller.org/
xftp传上去云端
当然这也需要很久 不多折合下来很大可能快50-100倍。如果像我一样有一台window云服务,那就让它来做这件事。下载,上传,都在云上进行。
详细请看
https://www.cmsky.com/linux-hosts/
步骤2.2中可能遇到的问题:
【Linux】 解决报错:
ImportError: libSM.so.6: cannot open shared object file: No such file or directory

原因:
libSM、libSM等不存在

解决办法:
yum install xxx

详:https://www.cnblogs.com/richerdyoung/p/8458910.html
步骤2.3中可能遇到的问题:
查看linux系统CPU和内存命令
https://jingyan.baidu.com/article/fdbd4277b16d1cb89e3f48e4.html
Python MemoryError
https://blog.csdn.net/xiaopihaierletian/article/details/57416110
在用Python处理大数据时,本来16G的内存,内存还没使用四分之一就开始报MemoryError的错误,后来才知道32bit的Python使用内存超过2G之后,就报这个错误,还没有其他的提示消息。果断换64bit的Python。
https://blog.csdn.net/weixin_33928137/article/details/93646975
https://blog.csdn.net/xovee/article/details/101077022
linux 使用文件增加虚拟内存 swap
https://msd.misuland.com/pd/3070888491219949990
https://www.cnblogs.com/ling-yu-amen/p/10819879.html
import cv2 找不到 face
AttributeError: module 'cv2.face' has no attribute 'createEigenFaceRecognizer' 解决办法
原因:
一.版本问题,目前使用版本cv2.face中createEigenFaceRecognizer更名或移除
解决:请查看对应版本的说明文档,使用对应版本或属性名。
二.未安装
opencv_contrib,所以
model = cv2.face.createEigenFaceRecognizer() 行找不到face
解决:
1.使用pip、源码安装方法
pip install opencv-python opencv-contrib-python
或
https://blog.csdn.net/wyx100/article/details/78498609
2.conda :
conda install opencv-python opencv-contrib-python
问:博主你的代码有问题,你的项目文件夹怎么建的?
答:项目还在开发中,这是俺滴毕设所以还未完善,只有个大概,望体谅谢谢大家
工具:xftp、xshell:https://www.netsarang.com/zh/free-for-home-school/
参考文献:
https://blog.csdn.net/abcd740181246/article/details/89878613
https://blog.csdn.net/zyxhangiian123456789/article/details/87911999